This tutorial will teach you how to label images for your project. To begin you need to be logged into your MaxusAI account and have your project open. This will continue from the start a project tutorial.
To start you need to import your images. To do this use the browse images button and select all of the images you intend to label in this project.
When you open a project you need to import the images every time since they’re not stored on the server. Don’t worry about this as the annotations are saved for each image and the annotations will be placed on the images once they’ve been imported.
Now you’ve imported your images you’re ready to learn the view port controls.
Controls
| Control | Action |
|---|---|
| Mouse scroll | Zoom in/out |
| Middle mouse button | Drag the image in the view port to view different parts |
| H | Hide or unhide toolbar |
| A | Add polygon point to selected polygon |
| D | Activates/Deactivates ‘delete’ brush |
| P | Activates/Deactivates ‘push’ brush |
| G | Group and ungroup same selected annotations |
| CTRL + Left Click | Select multiple polygons of the same label |
| SHIFT + Moving Mouse | Draws continuous polygon points |
| M | Activates ‘Magnetic/Snap’ mode which sets with a new point on the nearest polygon line. |
| DEL | When Polygon has been selected: Deletes the polygon |
| ESC | When in Drawing Mode: Exits drawing mode and discards current polygon |
| Space | Start and finish drawing a polygon |
| Double Click | When hover over existing point: Cursor changes to cross and allow to drag and drop point |
| When over empty image space: Allows to drag and drop image to move it on the canvas | |
| When in drawing mode: Allows to drag and drop image to move it on the canvas without setting a new point | |
| Single Click | When over empty image area: Start a new polygon and sets first point |
| When in Drawing Mode: Sets a new point | |
| When over a polygon area: Selects the polygon |
Labelling an image
When you want to label an image the first thing you need to do is create labels for the objects in the image. You can read the tutorial here to create those labels.
Once that’s done you’re ready to start drawing polygons around the objects in the image.
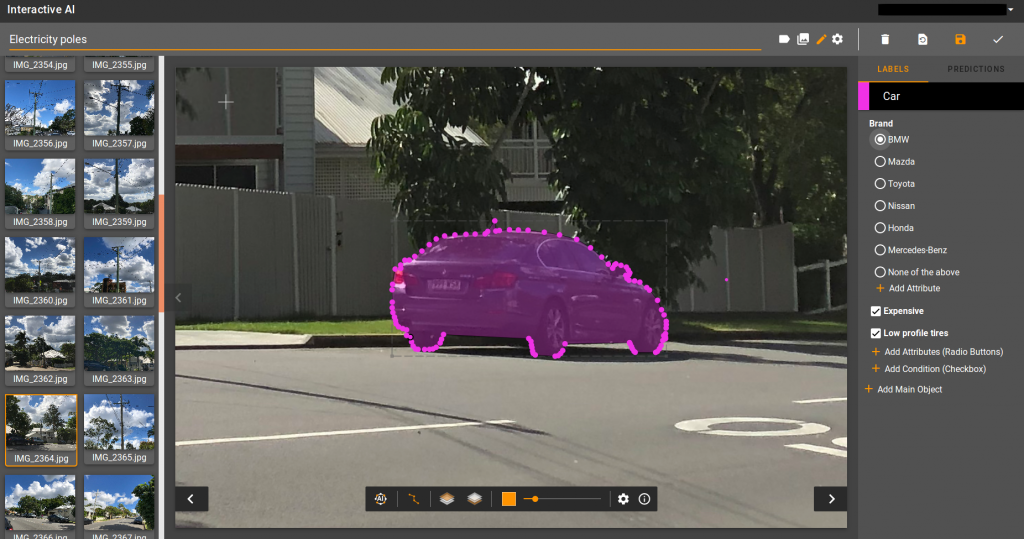
To start drawing a polygon select the label for that polygon on the right hand side toolbar and use a single click or space to start the polygon drawing. You can either keep using single clicks to add a vertex where your mouse is hovering over or hold shift to let the drawing tool add vertexes at set increments. Here is an example of a car labelled using the single click method.
Here is the same car labelled with the shift and drag method.
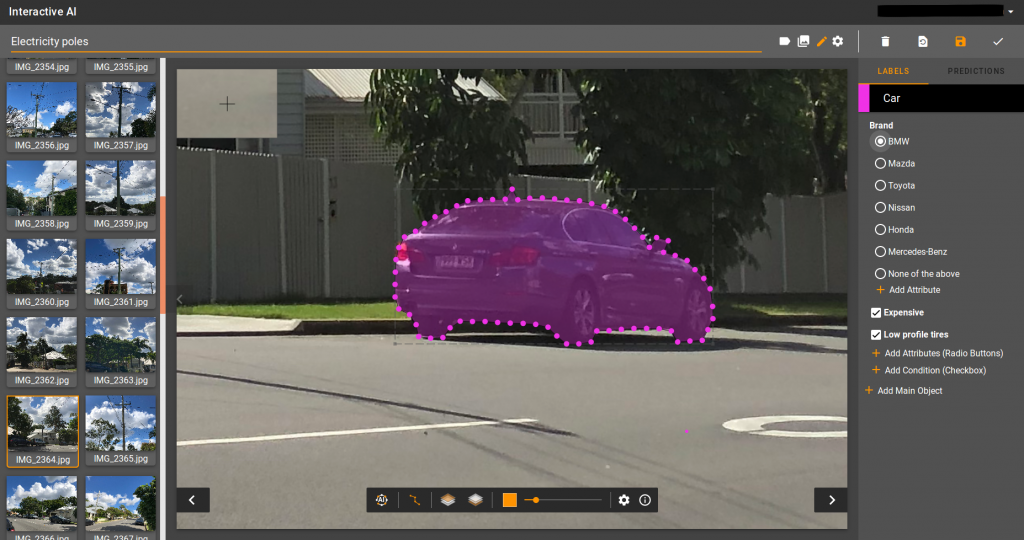
Each method has its own uses. The clicking method works really well for intricate objects where there are lots of corners or curves that require precision in the vertex placement or straight lines where more vertices aren’t required. The drag method can be used on anything it can in some situations create more or less vertices than needed but that can be modified after drawing the polygon. If the drag method doesn’t have a vertex placed right in the required position that can be edited after drawing the polygon just by clicking a vertex and dragging it to the required position.
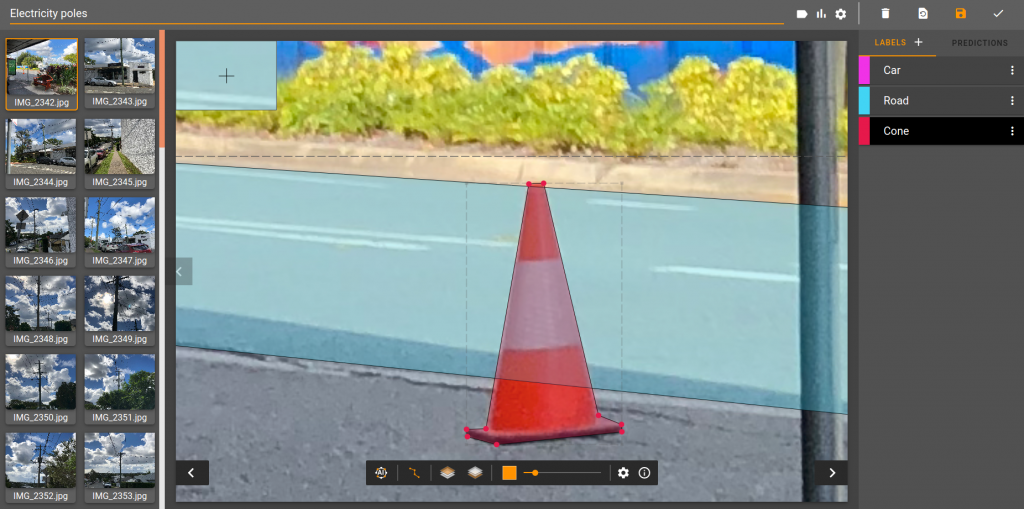
Polygon clipping
Polygon clipping is used when you have two or more overlapping polygons. To do this first you must select one of the polygons and send it to front or back using the layer buttons on the little bar in the viewport. After this you must hold the Ctrl key and select the two polygons you wish to splice.
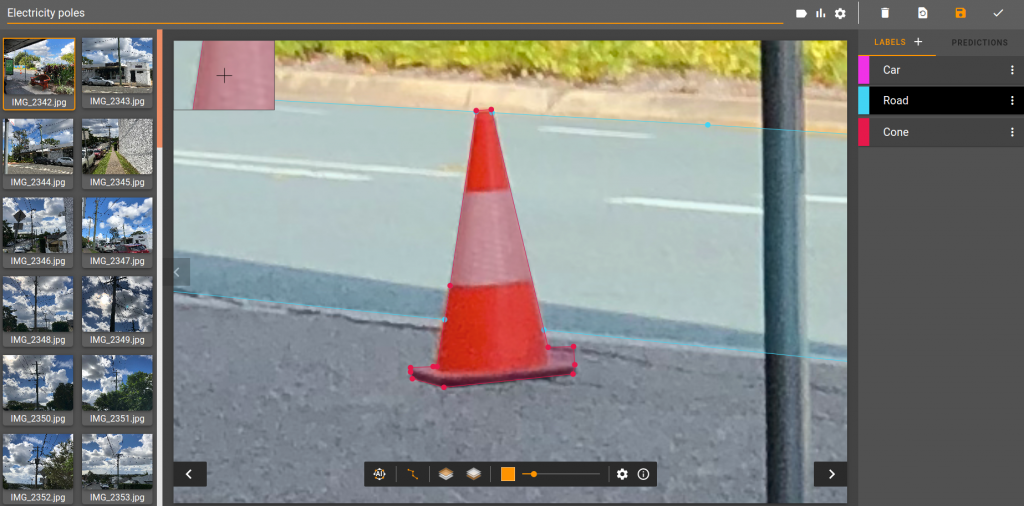
Once the polygons are selected, press the cut overlapping polygons button. It’s located to the right of the AI segmentation button.
You should now have cut polygons as shown below.
So that’s it. You’ve learnt how to label images for your project in Interactive AI.