| Start/Select a polygon | Click | Start or select a new polygon |
| Start/End a polygon | Spacebar | Start or end a new polygon |
| Zoom | Scroll Wheel | Zoom in or out at the mouse pointers location |
| Delete | Del (fn+Del on Mac) | Deleted selected polygon or point |
| Discard | Esc | Discards current in-progress polygon |
| Undo | Ctrl+z | Undo last action (point placement or polygon creation) |
| Select Multiple | Ctrl+Click | Select multiple polygons |
| Turbo mode | Hold Shift+Click | Activates Turbo Mode |
| Add point | a | Adds a point to the selected polygon |
| Delete brush | d | Activates/Deactivates delete brush |
| Push brush | p | Activates/Deactivates push brush |
| Magnetic Mode | m | Activates/Deactivates magnetic mode |
| Group | g | Groups selected polygons |
| Copy Polygon | Ctrl+c | Copies the selected polygon |
| Paste Polygon | Ctrl+v | Pastes a previously copied polygon from the clipboard |
| Select All Instances | Ctrl + Shift + Click | Selects all class instances on the image of the polygon clicked on |
General Tips
To control the brush radius for push and delete tools open the settings menu then increase or decrease the “Brush Radius”
To change the frequency of points in “SHIFT” (Turbo) Mode increase or decrease the “Turbo Place Point Distance (Pixels)” setting
For fine detail annotations or high-resolution images, the loupe zoom multiplier in the top left’s zoom can be controlled in settings
Basic Tools
Starting a polygon:
Click or Spacebar on an image.
Ending a polygon:
Spacebar to end an image.
Select a polygon:
Click on the polygon
Ctrl+Click to select multiple polygons
Zoom in or out:
Adjust mouse Scroll wheel or 2 finger scroll on the trackpad
Delete a polygon or point:
Del while polygon or point selected
Discard polygon process:
Esc while a polygon is in progress
Advanced Tools
Turbo Mode
Hold Shift+Click to activate Turbo Mode – TurboMode, places polygons following the path of the pointer at a set distance apart (frequency of points customizable in settings)
Add Point to Polygon
Select polygon then click ‘a‘ on the keyboard near the edge of a polygon to add a point to the polygon where the pointer is
Delete Brush
Click ‘d‘ on the keyboard to activate/deactivate the delete brush
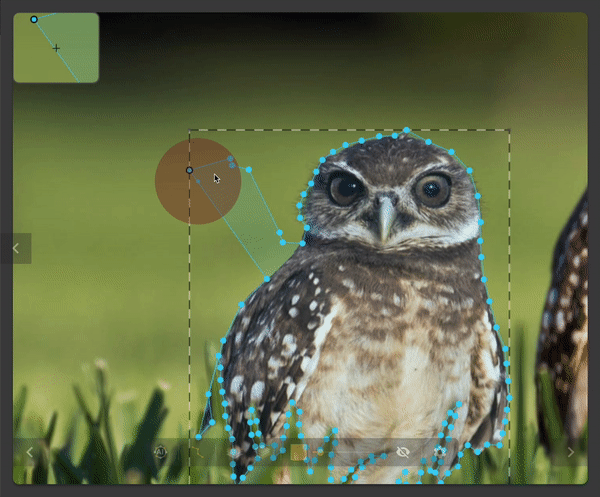
Push Brush
Click ‘p‘ on the keyboard to activate/deactivate the push brush
- Note it can be used on single or multiple polygon points and the brush size is customisable in the settings
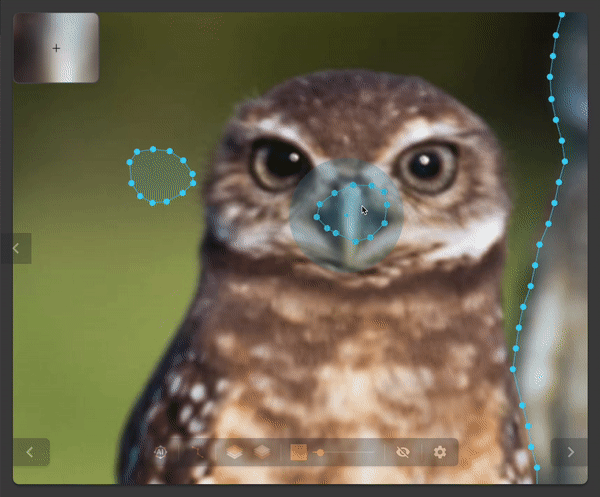
Magnetic Mode
Click ‘m‘ on the keyboard to activate/deactivate magnetic mode. Magnetic mode snaps the next polygon to the nearest polygons edge.
Note: Shift was held to snap to the entire edge quickly while in magnetic mode
Group polygons
- Select all target polygons (must all be the same label) with a Ctrl+Click
- Click “g” on the keyboard
- The polygons should now be grouped.
- To reverse a grouping. Select the group and click “g”
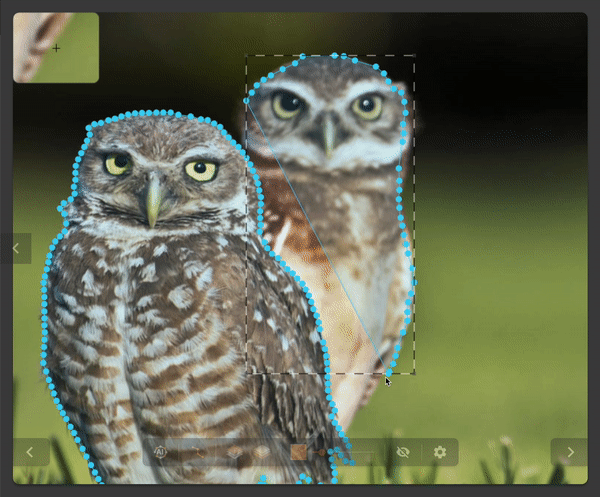
Cut a Polygon
Ctrl+Click on the 2 polygons
Click Splice tool
Change Label Layer
Select the target polygon.
Click layer front of layer back icon in the toolbar
Predictive Tools
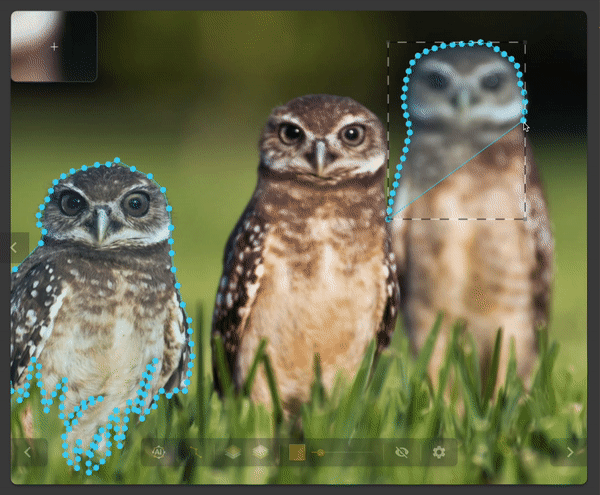
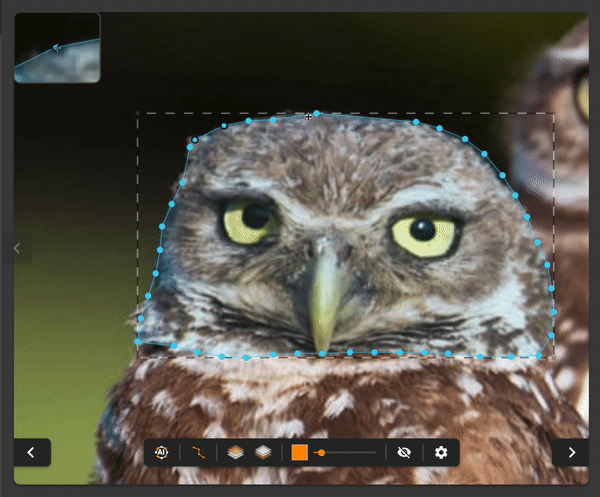
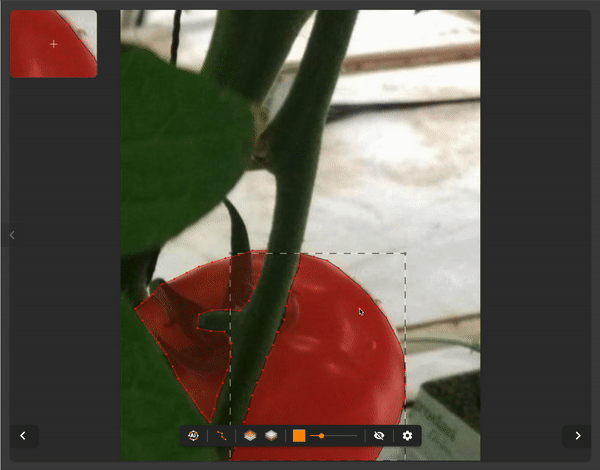
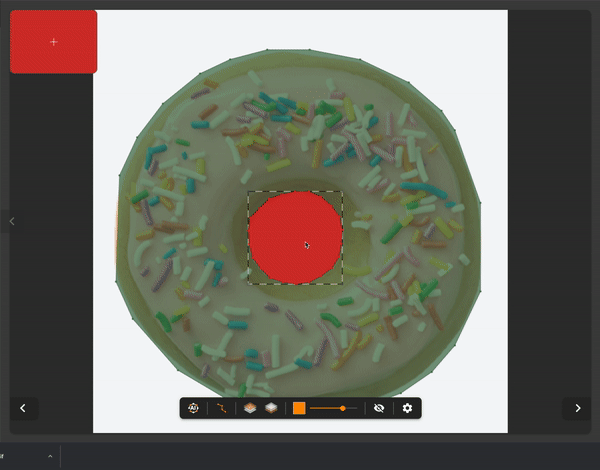
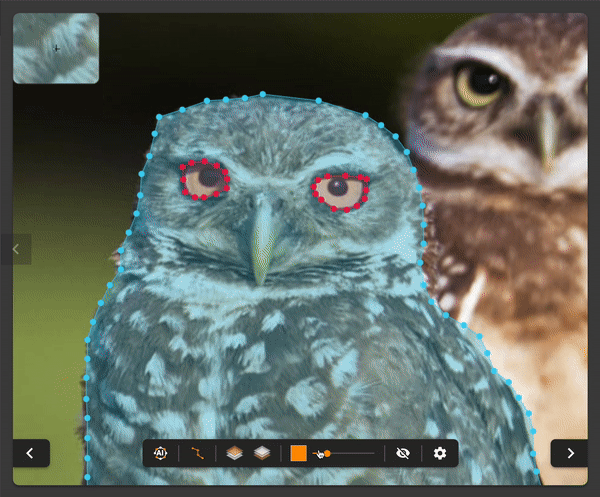
AI Auto Segmentation
To Use AI Auto Segmentation, Click the Auto Segmentation Icon
Now create a 4 pointed polygon, each point being at the extreme most points of the target object.
- The Highest Point
- The Lowest Point
- The Leftmost Point
- The Rightmost Point
Finally, wait for the polygon to snap into place.

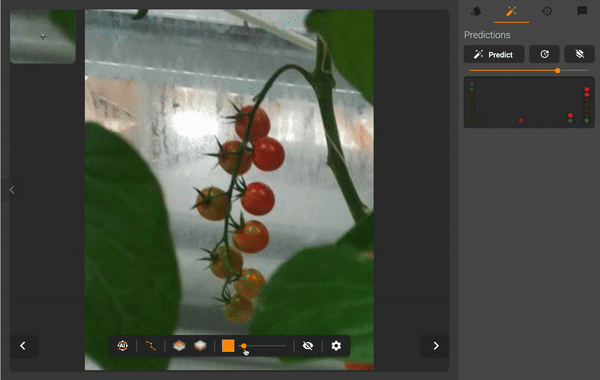
Predictive Labelling
To use the predictive labelling first endure AI Endpoints have been added to the project.
Then navigate to the “Predictions Tab” on the right panel. Select your prediction threshold (how confident the model must be to place a polygon)
Click “Predict”